


Creating a New Infotype
Step 1 Execute transaction PM01 (If you get a message saying the infotype can not be enhanced, Try transaction PPCI).
Step 2Select create IT tab and enter new infotype number into selection box.
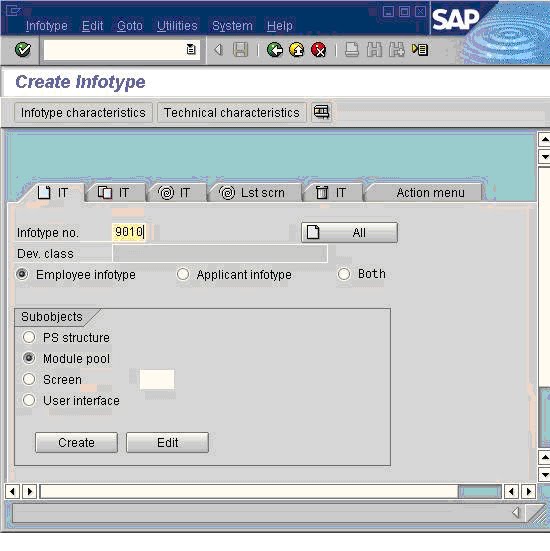
Step 3Press the create ‘ALL’ button (left of infotype no.). You will get a dialog box asking to confirm,
press the create button.
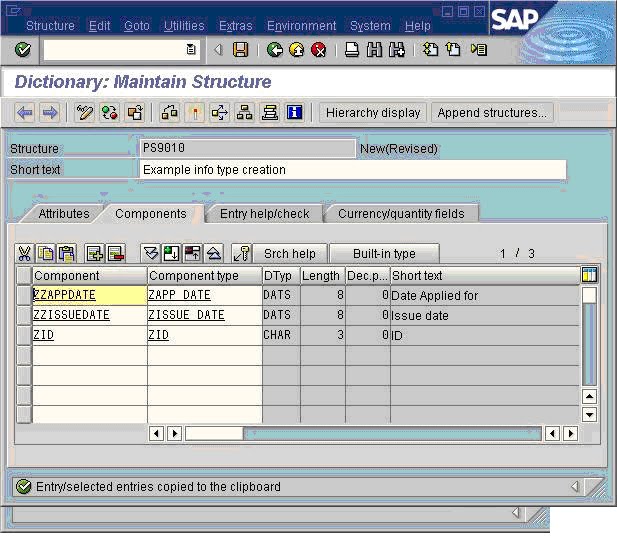
Step 4You will now be presented with the standard structure creation screen (SE11) where you need to enter the fields of the new infotype. I have entered some examples but you can put anything in
here.
Step 5Once you have entered the fields press save and then activate, before pressing the back button.
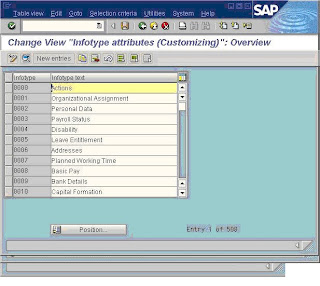
You will now be presented with the following screen, where you will need to make a new entry
or your created infotype (i.e. 9010).
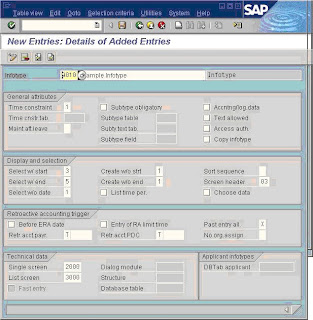
Step 6The next step is to fill in the infotype attributes, these will initially be blank and you will need to
ill them in similar to the following depending on requirements. Press save.
Step 7Your infotype is now created and can be accessed and populated in the usual way using
i.e. using transactions such as PA20 and PA30.
Step 8
If you look at the structure of your new infotype in transaction ‘SE11’ it will look similar to the
following:

Step 1 Execute transaction PM01 (If you get a message saying the infotype can not be enhanced, Try transaction PPCI).
Step 2Select create IT tab and enter new infotype number into selection box.

Step 3Press the create ‘ALL’ button (left of infotype no.). You will get a dialog box asking to confirm,
press the create button.
Step 4You will now be presented with the standard structure creation screen (SE11) where you need to enter the fields of the new infotype. I have entered some examples but you can put anything in
here.

Step 5Once you have entered the fields press save and then activate, before pressing the back button.
You will now be presented with the following screen, where you will need to make a new entry
or your created infotype (i.e. 9010).

Step 6The next step is to fill in the infotype attributes, these will initially be blank and you will need to
ill them in similar to the following depending on requirements. Press save.

Step 7Your infotype is now created and can be accessed and populated in the usual way using
i.e. using transactions such as PA20 and PA30.
Step 8
If you look at the structure of your new infotype in transaction ‘SE11’ it will look similar to the
following:

No comments:
Post a Comment